Download for your Windows
There are two ways to use the Static ISP Proxy, one is to configure the proxy for use on the web side and the other is to configure the proxy for use on the IP2 Manager.
WEB PAGE:
STEP 1
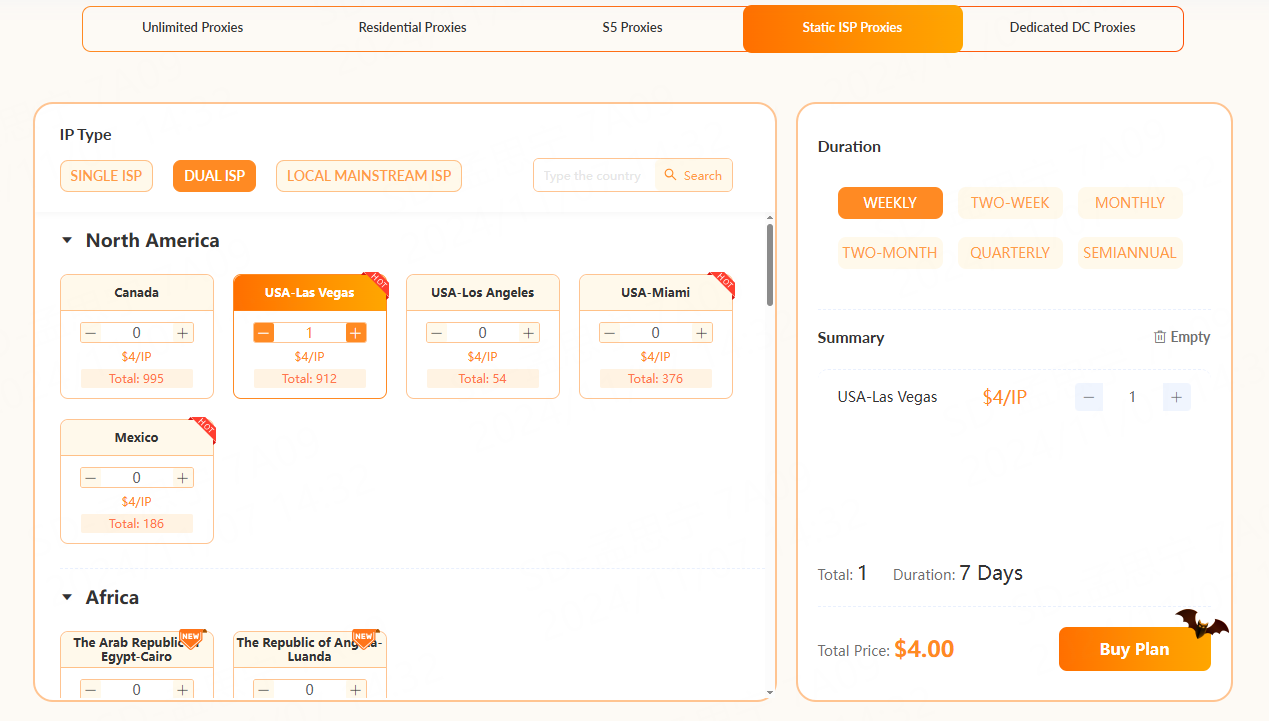
Purchase one or more Static ISP Proxies on the IP2World purchase page.
STEP2
After successful purchase, please go to Dashboard to redeem the Static ISP Proxy first.
There are two forms of redemption here.
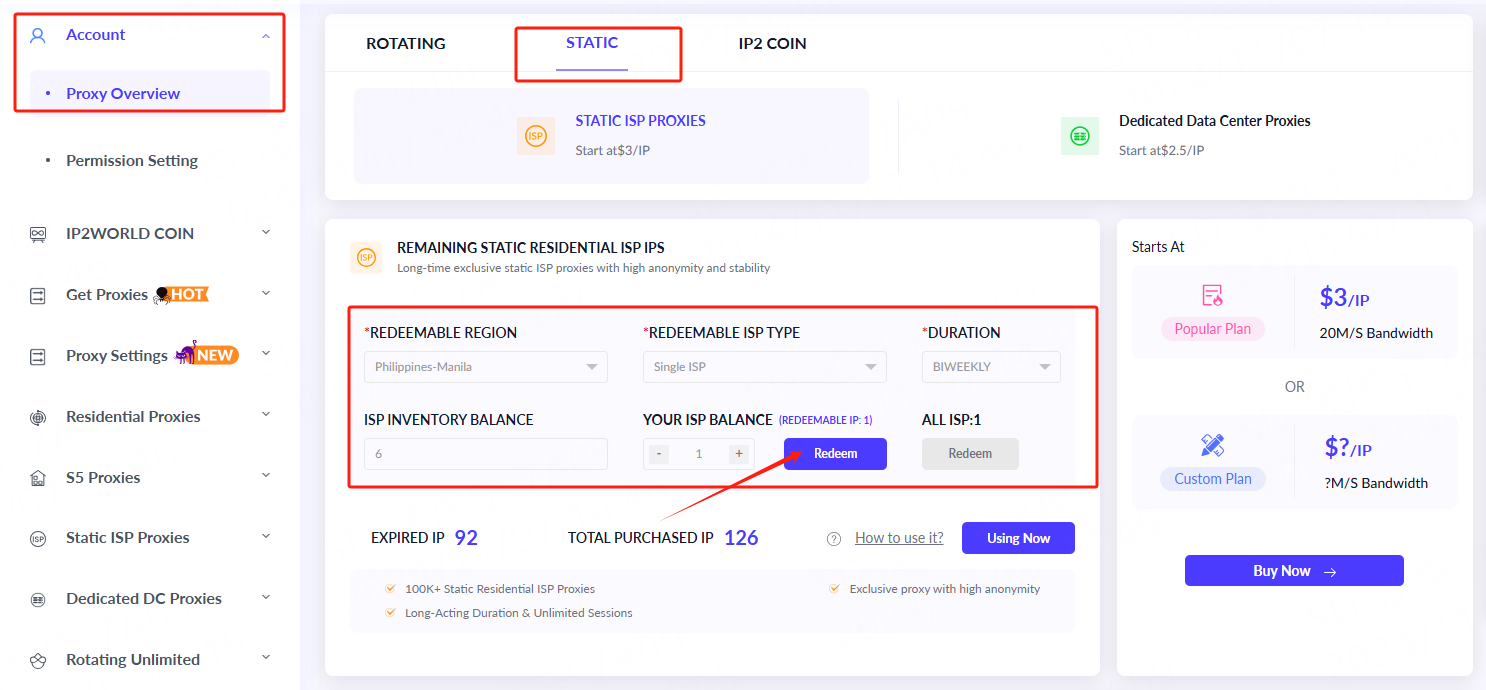
1. Select the country region to redeem
Please note that you can only redeem IPs from one country or region at a time, if you want to redeem all IPs at once, please click the Redeem All button.
Please note that clicking the Redeem button will redeem all static IPs in your account, and the IPs will arrive in your account after 1 minute of successful redemption.
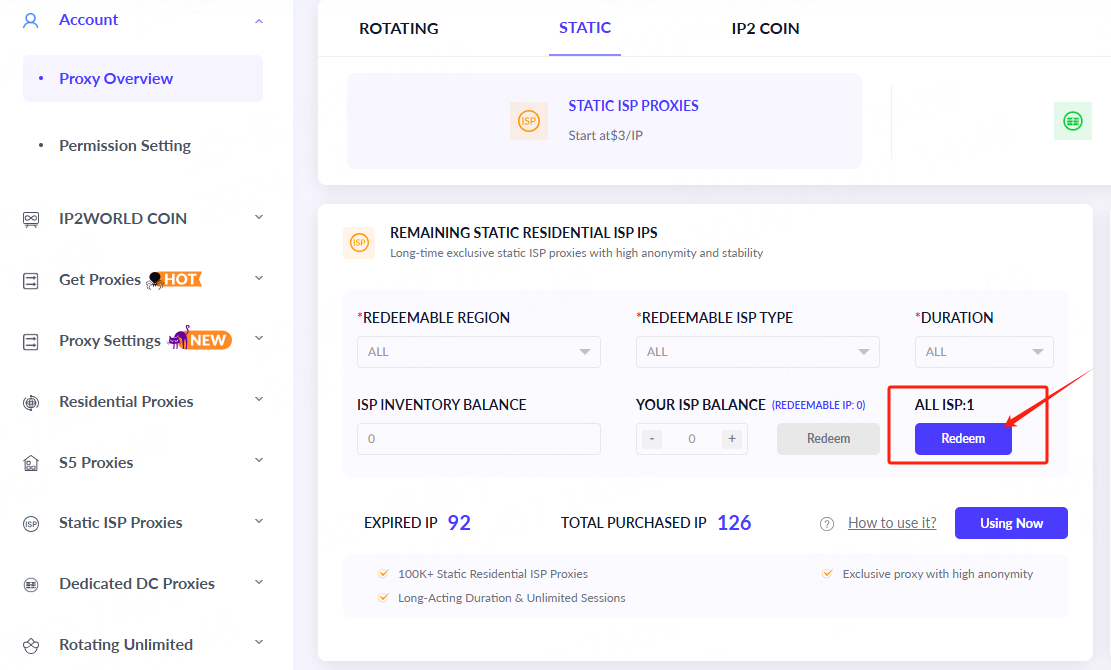
2. All Redeem
If you want to redeem all IPs at once, please click the Redeem All button.
STEP 3
After successfully redeeming the IPs, get the Static ISP Proxy information and use it.
1. Whitelist Authentication
Click Get Proxy - API - Static ISP Proxy to set proxy information.
After selecting the Count/Country/Protocol, click the Generate API Links to copy the link and configure it for use in the application, or open the link to get the specific proxy information and copy it yourself.

Please note that you need to add your local IP to the IP Allowlist before using whitelist authentication.
You can click Proxy Settings - IP Allowlist - Add Local IP to whitelist.
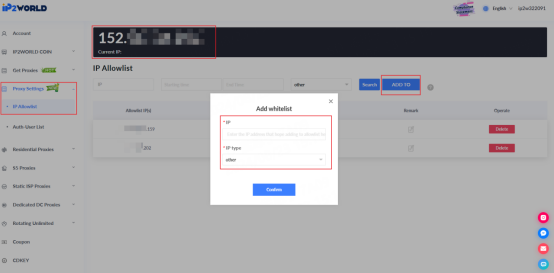
It is also possible to add a whitelist in Get Proxy - API - Static ISP Proxy.

2. User+Pass Auth
Click Get Proxies - User+Pass Auth - Static ISP Proxy to set proxy information.
After selecting the Country/IP/Port/Username, select the required proxy information format to batch generate the proxy information and configure it for use in the corresponding program.
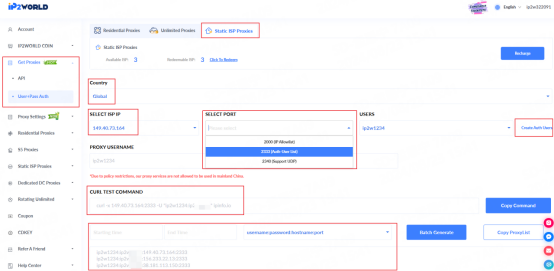
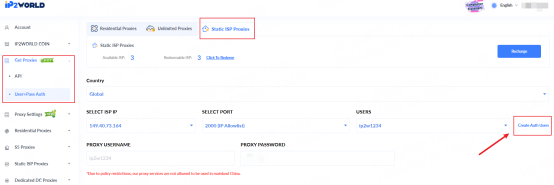
Please note that you need to add an authorized user before using User+Pass Auth, that is you need to add a proxy username and password by yourself.
You can add an authorized user in Proxy Settings – Auth User List.

You can also add an authorized user in Get Proxies - User+Pass Auth - Static ISP Proxy.
STEP 4
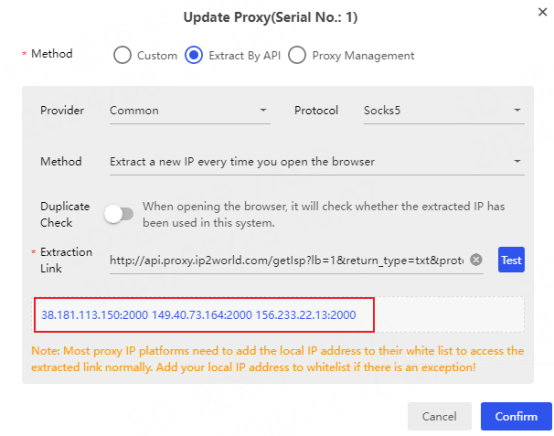
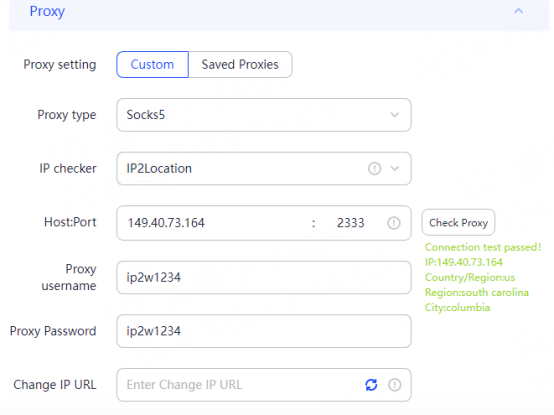
After getting all the proxy information, you can directly configure the proxy information into the corresponding program, here take fingerprint browser as an example.
1. Whitelist Authentication:
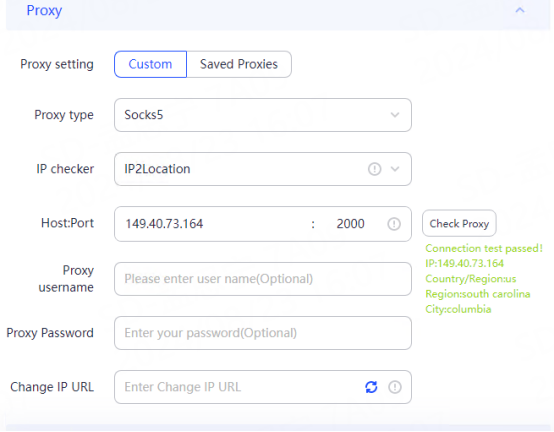
2. User+Pass Auth:
IP2 MANAGER:
STEP 1
Purchase one or more Static ISP Proxies on the IP2World purchase page.

STEP 2
After successful purchase, open IP2 Manager to bind Static ISP Proxy.
1. Click ISP-IP Allowlist-add the local IP to the IP Allowlist.

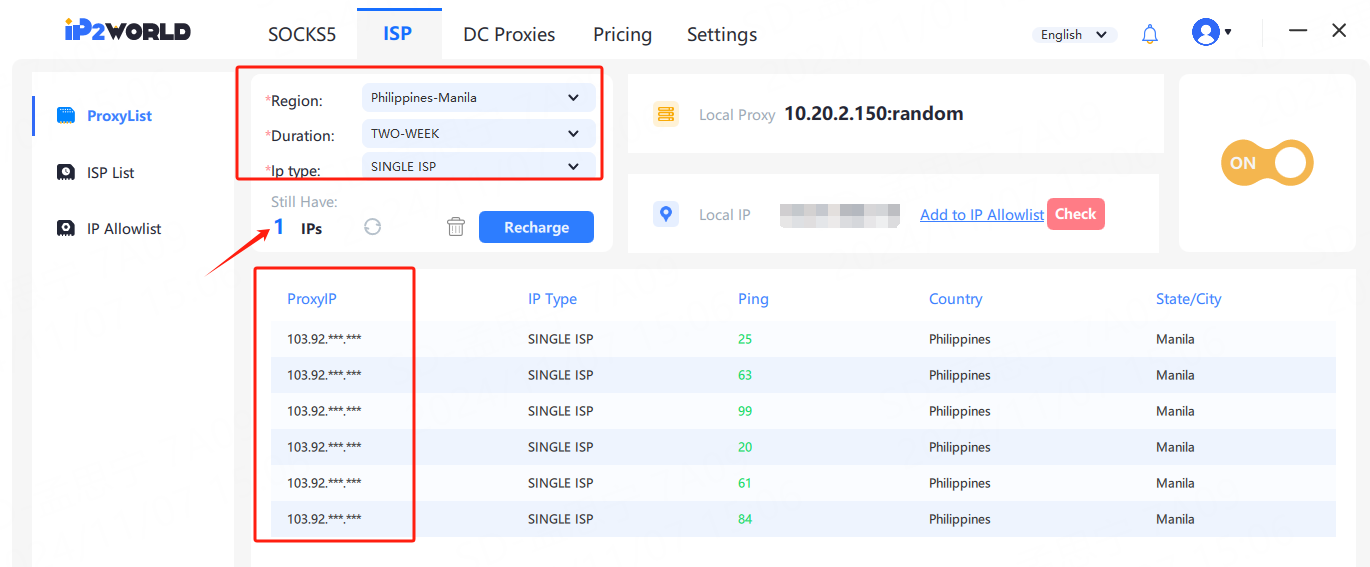
2. Click ProxyList - select the Region/Duration/IP Type you bought, if it shows still have 1 IP, you can select the IP segment to bind the IP in the proxy page below.
Please note that at present, we only support selecting IP segments, but not the whole IP.
3. Select a suitable static IP, right click the first option to bind the IP.
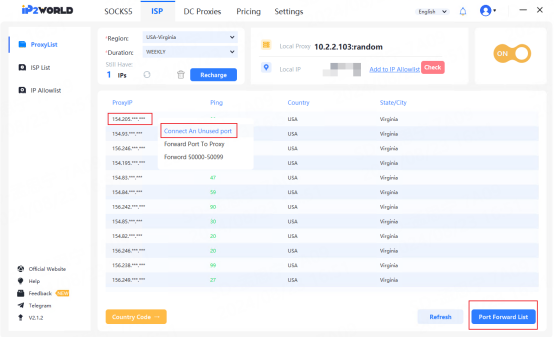
4. After binding the IP, click ISP List - Port Forward List - copy the bound IP and port, and paste them into the program you need to use the proxy.

STEP 3
After obtaining the proxy information, configure the proxy information into the corresponding program, here is an example of a fingerprint browser.
