Download for your Windows
Feature 1: Check Proxy
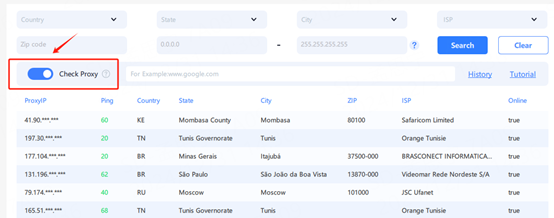
Before you bind an IP, you can check whether the IP can access your business website.
Step 1:
Turn on Check Proxy button.

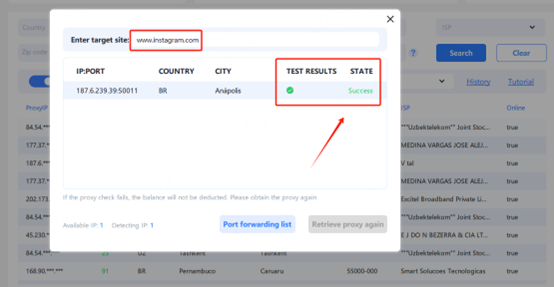
Step 2:
Enter the target website you want to access.
Below is an example of www.instagram.com.

Step 3:
Right-click on an IP you want to bind and check it.
If you can access the target website, it will show success.

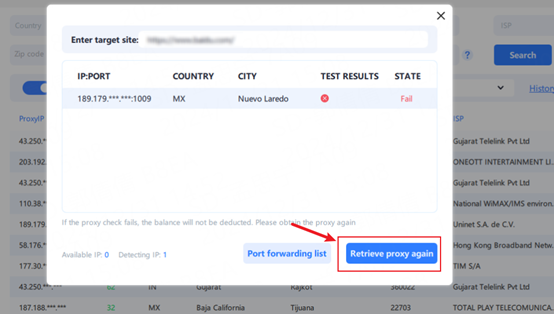
If the detection fails, click the Re-acquire Proxy button at the bottom right corner to get a new IP bonding and detection until the bonding is successful.

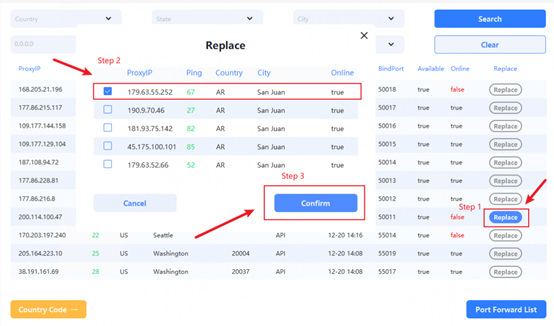
Feature 2: Replace Proxy
When your bonded IP goes offline within 5 minutes, you can click the Replace button to replace it with a new IP for free.
